
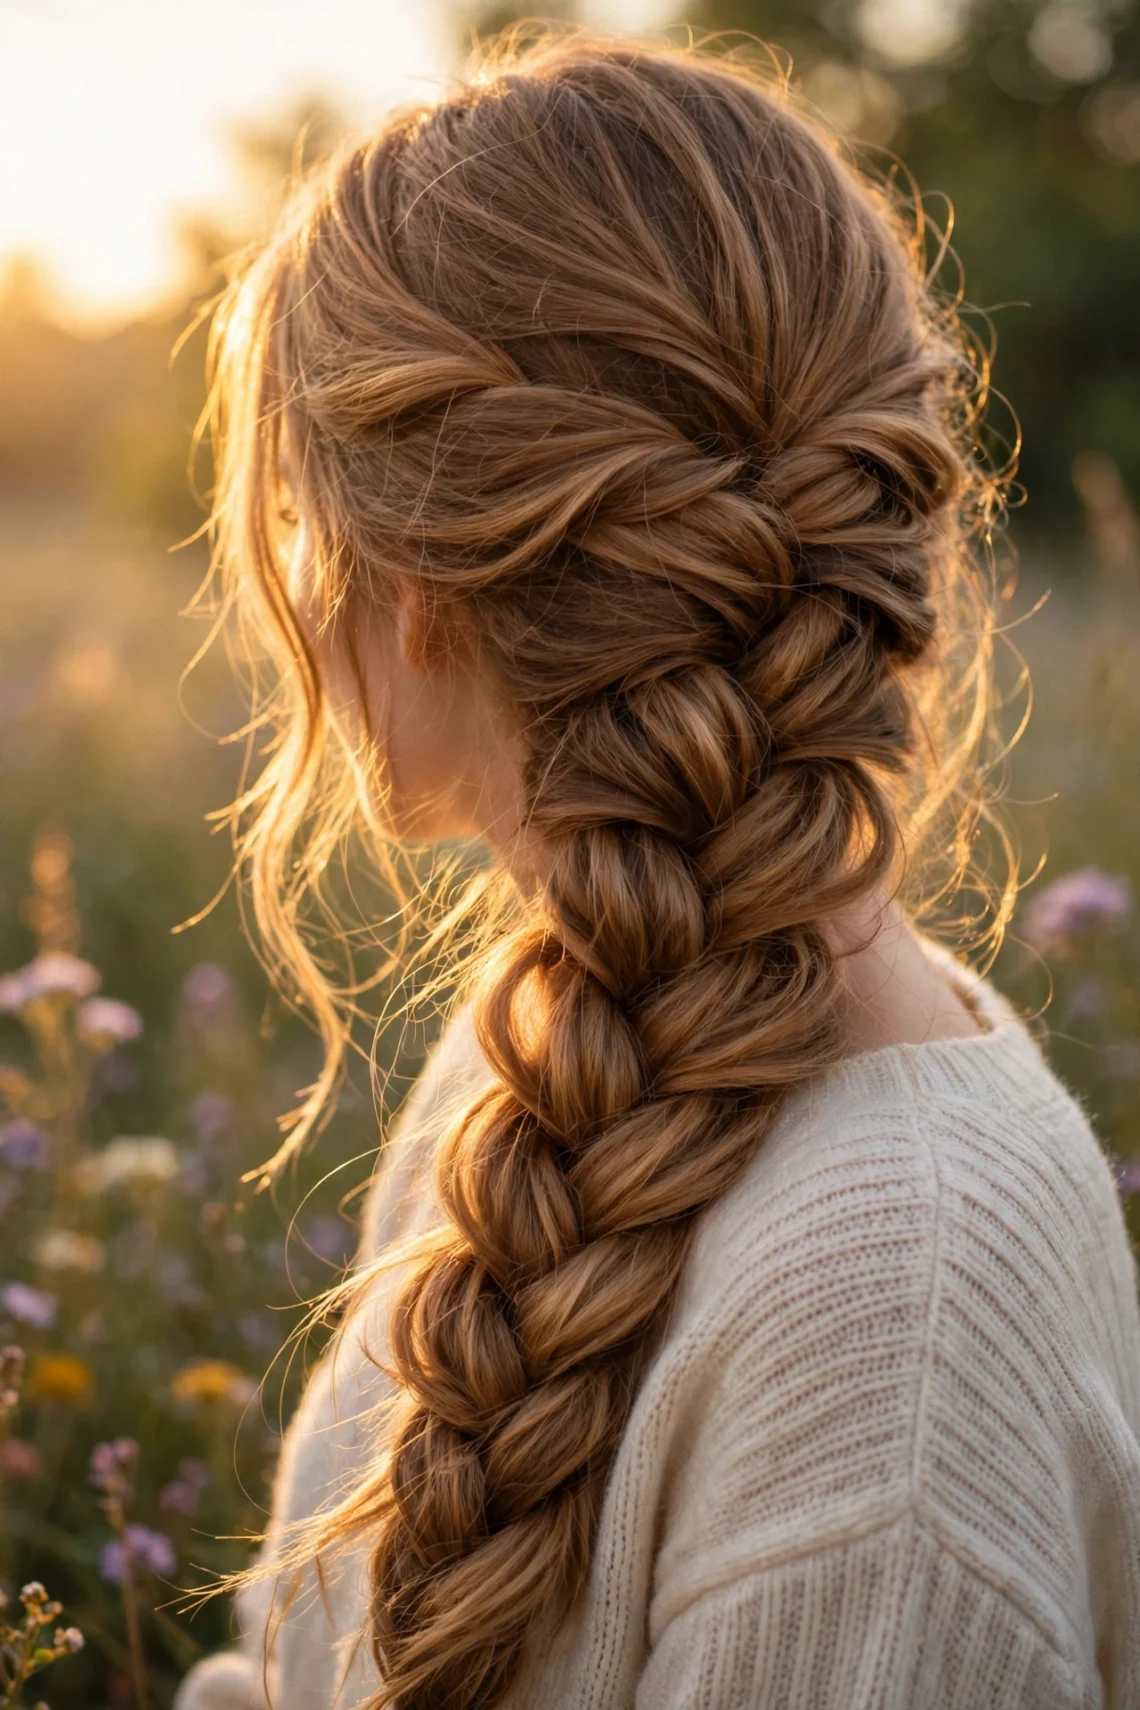
17 Easy Dutch Braid Hairstyles with Step-by-Step Tutorials 2026

Dutch braids — the inside-out cousins of French braids — sit proudly on top of the hair instead of blending into it, which is exactly why these dutch braid hairstyles look so bold and dimensional in photos. The good news is that the technique is far simpler than it looks: once you learn to cross strands under instead of over, you can create seventeen gorgeous variations in minutes. This guide walks you through each style step by step, with beginner-friendly tips so your braids come out neat, full, and camera-ready every single time.
All you need is a brush, a few clear elastics, and a little patience on your first try — second-day hair actually braids better because it has more grip. If you can do a basic three-strand braid, you are already ninety percent of the way there. Each idea below includes the exact steps, plus tricks like pancaking (gently pulling the braid edges wider) for that thick, Pinterest-perfect finish. And if you fall in love with braids in general, do not miss our braided hairstyle ideas for every hair length for even more inspiration.
1. Classic Double Dutch Braids
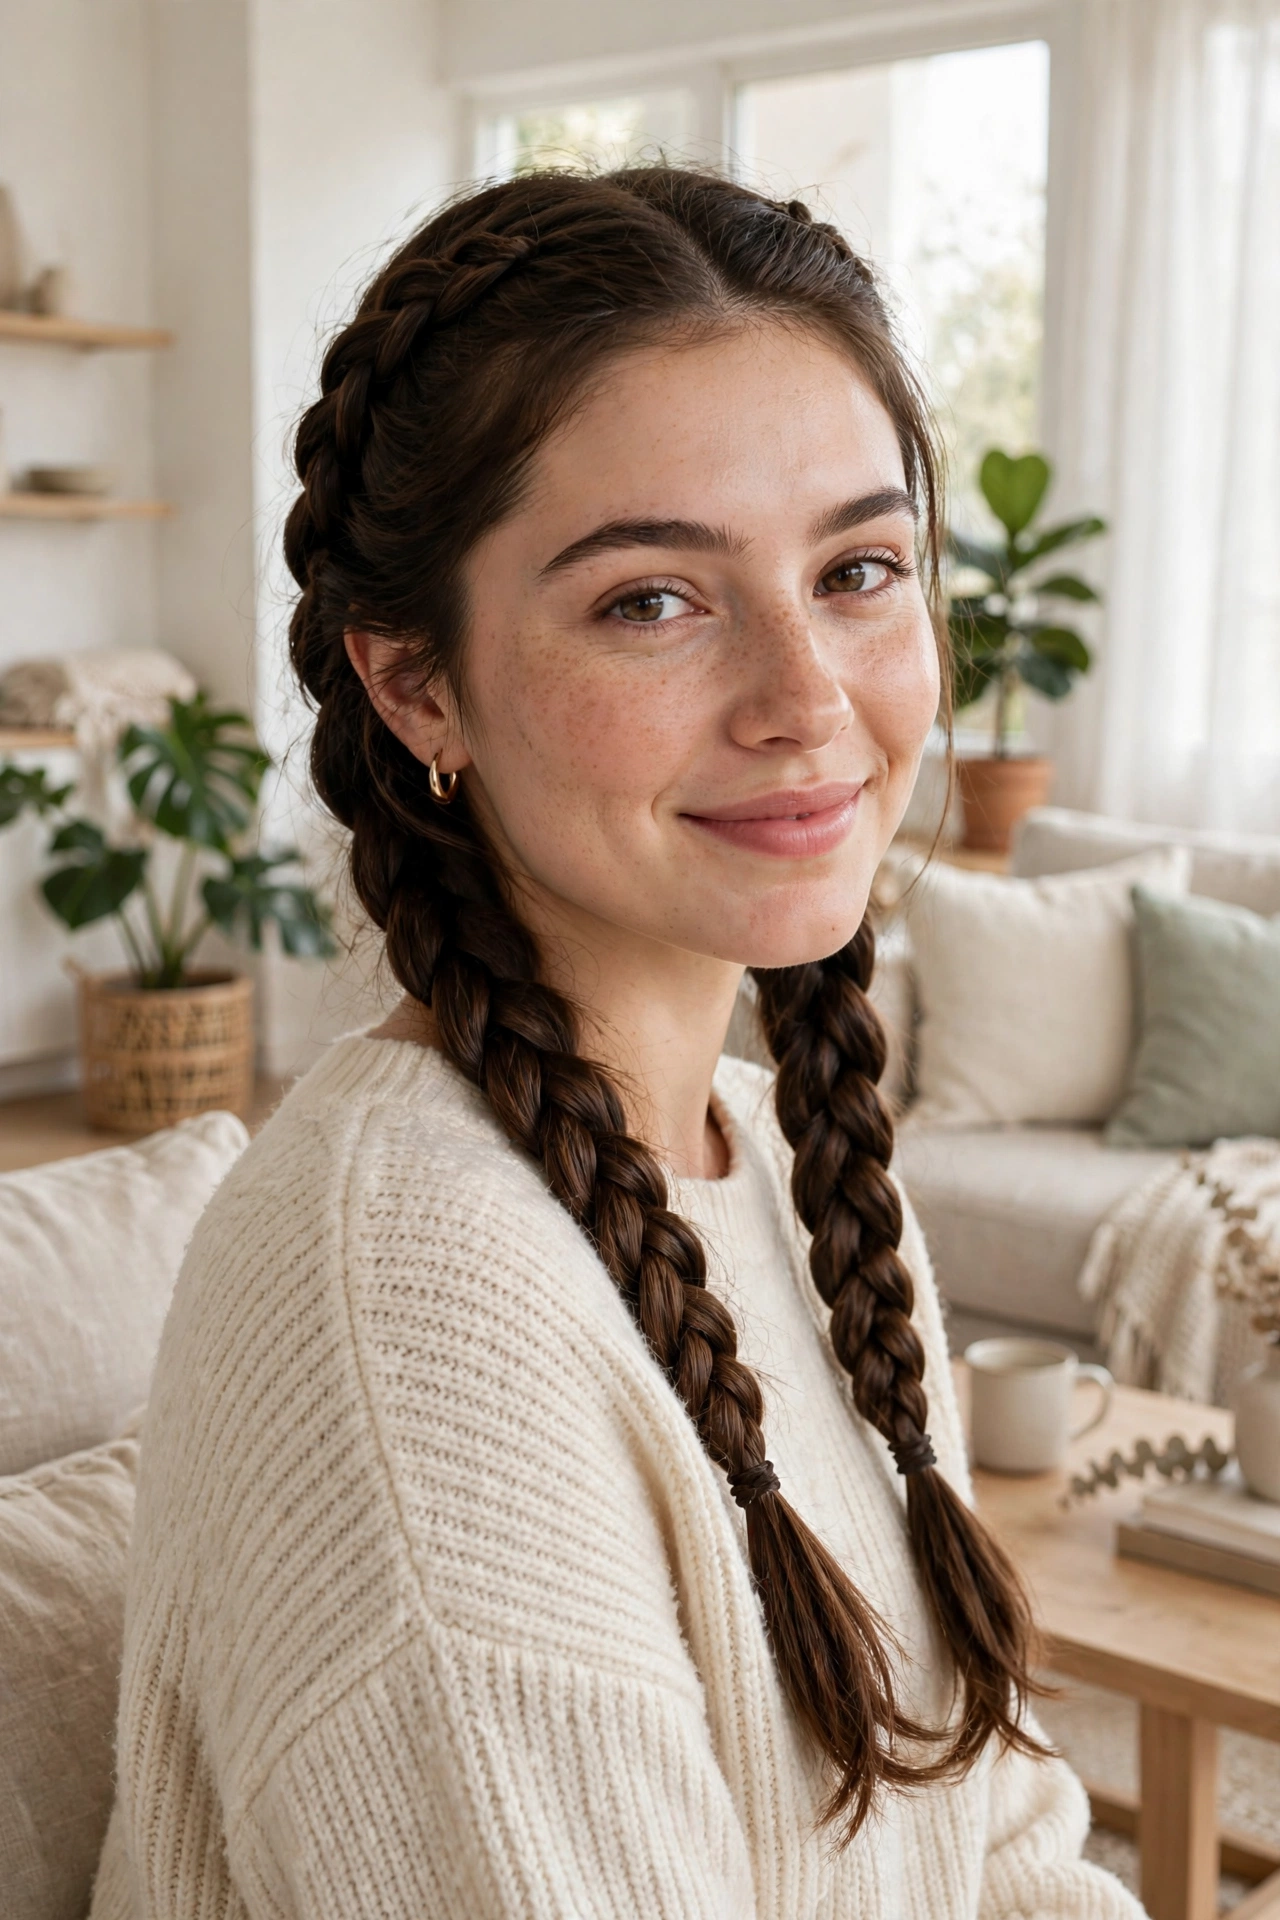
Start with a clean center part and clip one side away so you only work with half your hair at a time. Take a triangle section near the hairline, split it into three strands, and begin crossing the outer strands under the middle one instead of over. As you work toward the nape, feed in small sections of hair from each side with every stitch, keeping your tension even so the braid sits raised and rope-like. Tie off with a clear elastic, repeat on the other side, then gently tug the braid edges outward — pancaking — for instant thickness.
This is the foundation of all dutch braid hairstyles, so mastering it unlocks everything else in this list. It works beautifully on medium to long hair and holds up through workouts, windy days, and long shifts. For a softer look, leave out two thin face-framing pieces before you start braiding, and finish with a light mist of flexible-hold hairspray. You can also curl the ponytail ends with a wand for a dressier finish, or wrap a small strand around each elastic to hide it for a polished, salon-level result.
2. Dutch Braid High Ponytail

Flip your head upside down and brush all your hair forward — gravity is your best friend for this style. Start a Dutch braid at the nape, crossing strands under as you add hair, and work straight up toward the crown where you want the ponytail to sit. Once you reach that point, gather everything (including the braid tail) into a high ponytail and secure it tightly with a sturdy elastic. Smooth the crown with a boar-bristle brush and a touch of gel for that sleek, snatched look that photographs beautifully.
This sporty-chic combo keeps hair completely off your face while looking far more intentional than a basic ponytail. Tease the ponytail itself for extra volume, or wrap a section of hair around the base to conceal the elastic. It is a gym-to-brunch hero that survives cardio and still looks fresh hours later. For even more ponytail inspiration, explore our polished ponytail hairstyle ideas that never look basic — pairing that guide with this braid gives you a full week of elevated ponytail looks without repeating the same style twice.
3. Dutch Braid Low Bun
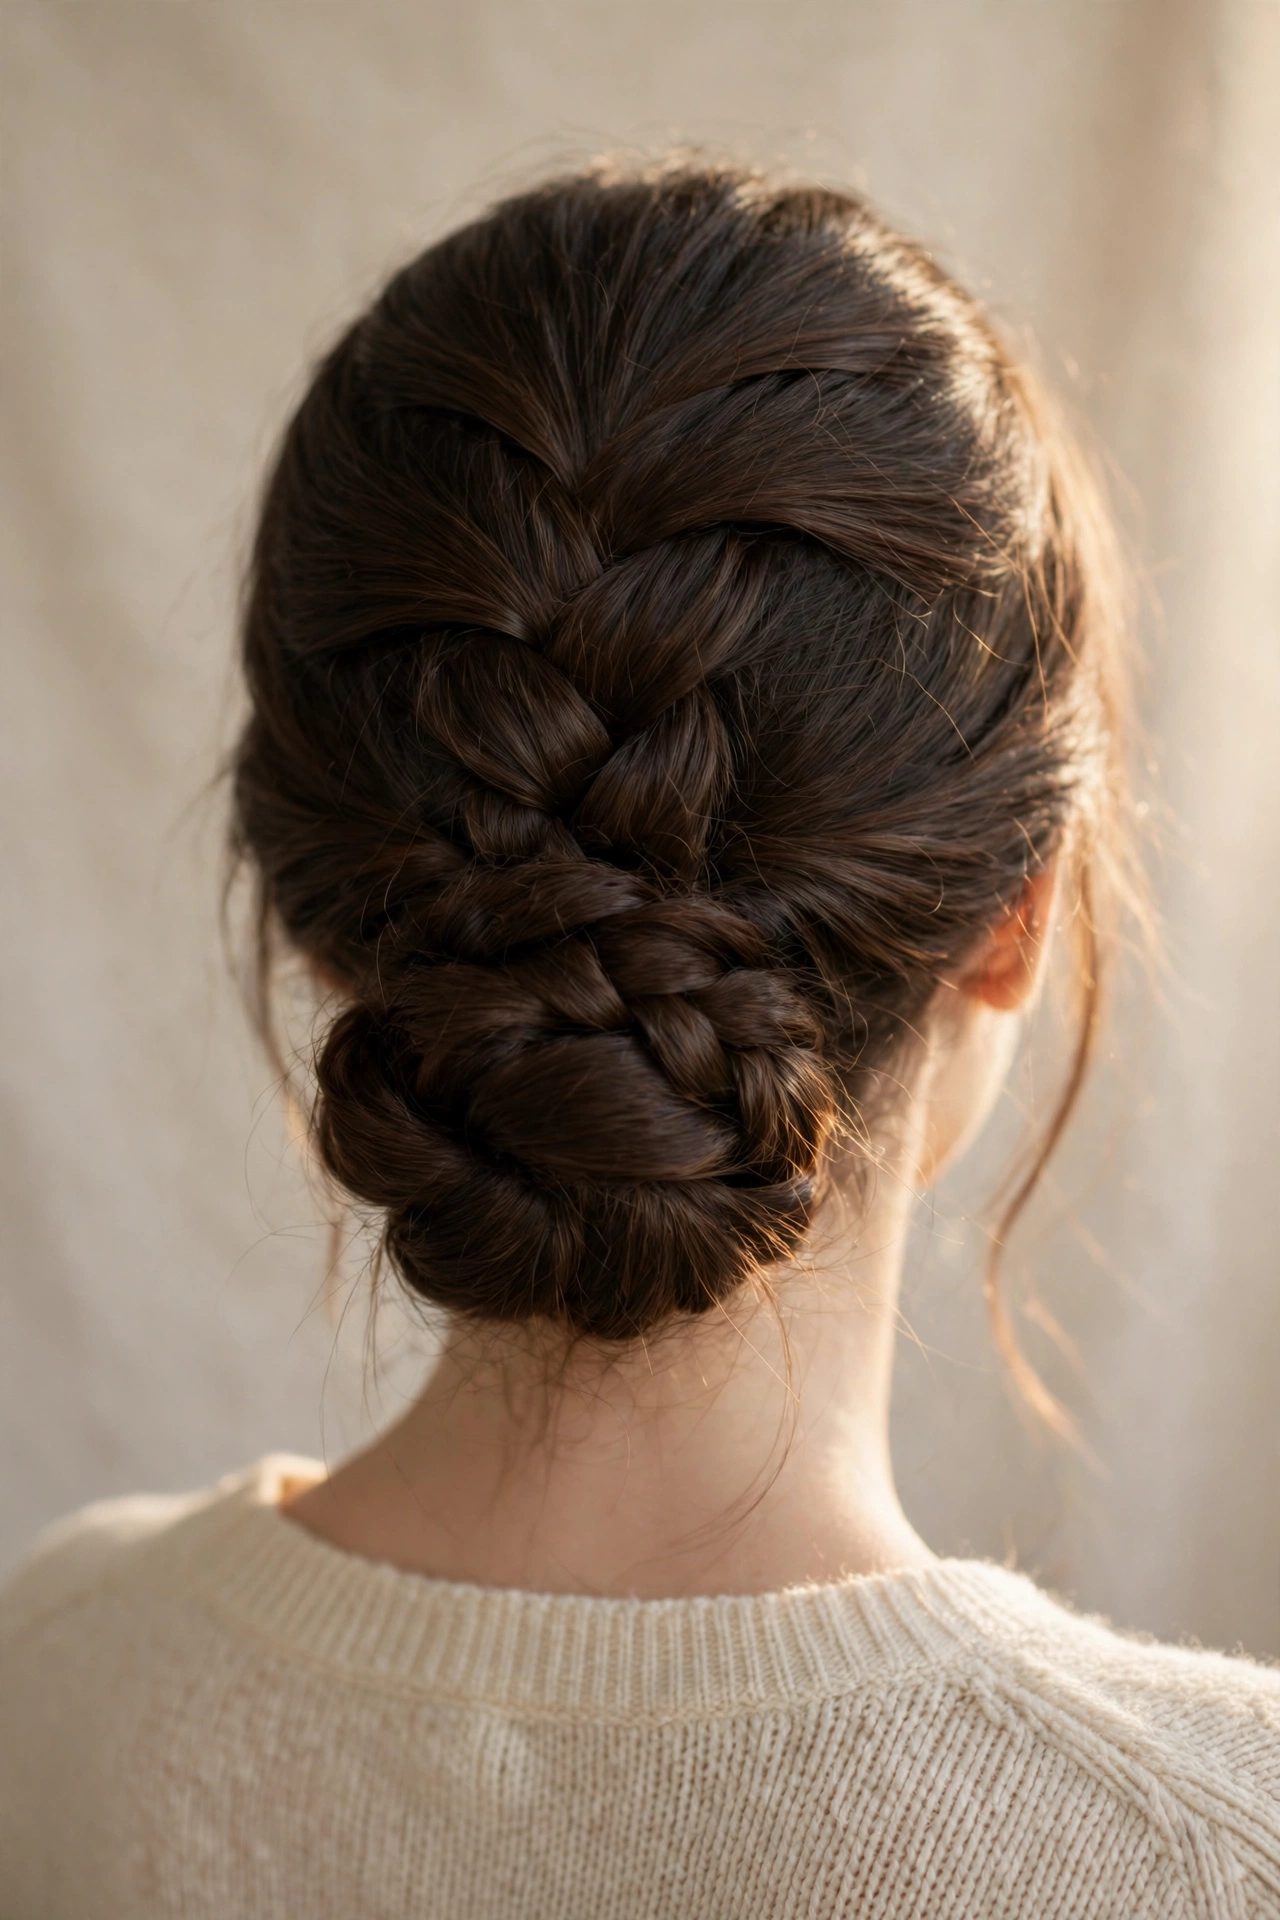
Create a deep side part and Dutch braid from the heavier side, working diagonally toward the opposite nape. Keep the braid close to the scalp by angling your fingers downward as you add hair. When you run out of hair to add, continue with a regular three-strand braid for a few inches, then coil the tail into a low bun and pin it securely with bobby pins in an X formation. Tuck the ends underneath so nothing pokes out, and gently pancake the braid for a fuller, more romantic silhouette.
Elegant enough for weddings yet simple enough for date night, this style flatters every face shape thanks to the soft diagonal line. It also camouflages second-day roots beautifully — a little dry shampoo at the crown is all the prep you need. Add pearl pins or a delicate hair vine along the braid for formal occasions, or keep it minimal for the office. The low placement keeps the look balanced and sophisticated, and it photographs gorgeously from every angle at events, making it a true special-occasion favorite.
4. Half-Up Dutch Braid Crown

Section off the top half of your hair from temple to temple, clipping the bottom half out of the way. Begin a Dutch braid just above one ear, working across the back of your head toward the other ear and adding hair only from the top section. When you reach the far side, secure the braid end behind your ear with bobby pins crossed in an X. Let the remaining top-section hair blend into the loose bottom half, then curl everything loosely for a soft, cohesive finish.
This romantic half-up style gives you the best of both worlds: the polish of a braid with the softness of loose waves. It is perfect for brunches, baby showers, and outdoor weddings where you want hair off your face but still flowing. The crown placement adds flattering height at the top of the head, which elongates rounder face shapes. Mist with texturizing spray before braiding for extra grip, and pull a few wispy pieces loose around your temples for that effortless, lived-in charm every single time.
5. Side-Swept Dutch Braid

Make a deep side part on your preferred side and sweep all your hair over the opposite shoulder. Starting at the part, Dutch braid diagonally across the head, keeping the braid chunky by using generous sections. Work down past your ear and continue the braid over your shoulder, securing the end with a small elastic. The asymmetry is what makes this style so striking — it creates a gorgeous diagonal line that draws the eye and shows off the braid’s raised texture beautifully in every photo.
Among all dutch braid hairstyles, this is one of the most universally flattering because the diagonal sweep softens strong jawlines and adds movement. It transitions effortlessly from day to night — wear it sleek for the office, then pancake the edges and add a spritz of shine spray for evening. This style also works wonderfully on layered hair since the side placement keeps shorter pieces contained. Pair it with statement earrings on the exposed side for maximum impact at weddings, parties, and date nights alike.
6. Dutch Braid Pigtails with Ribbons
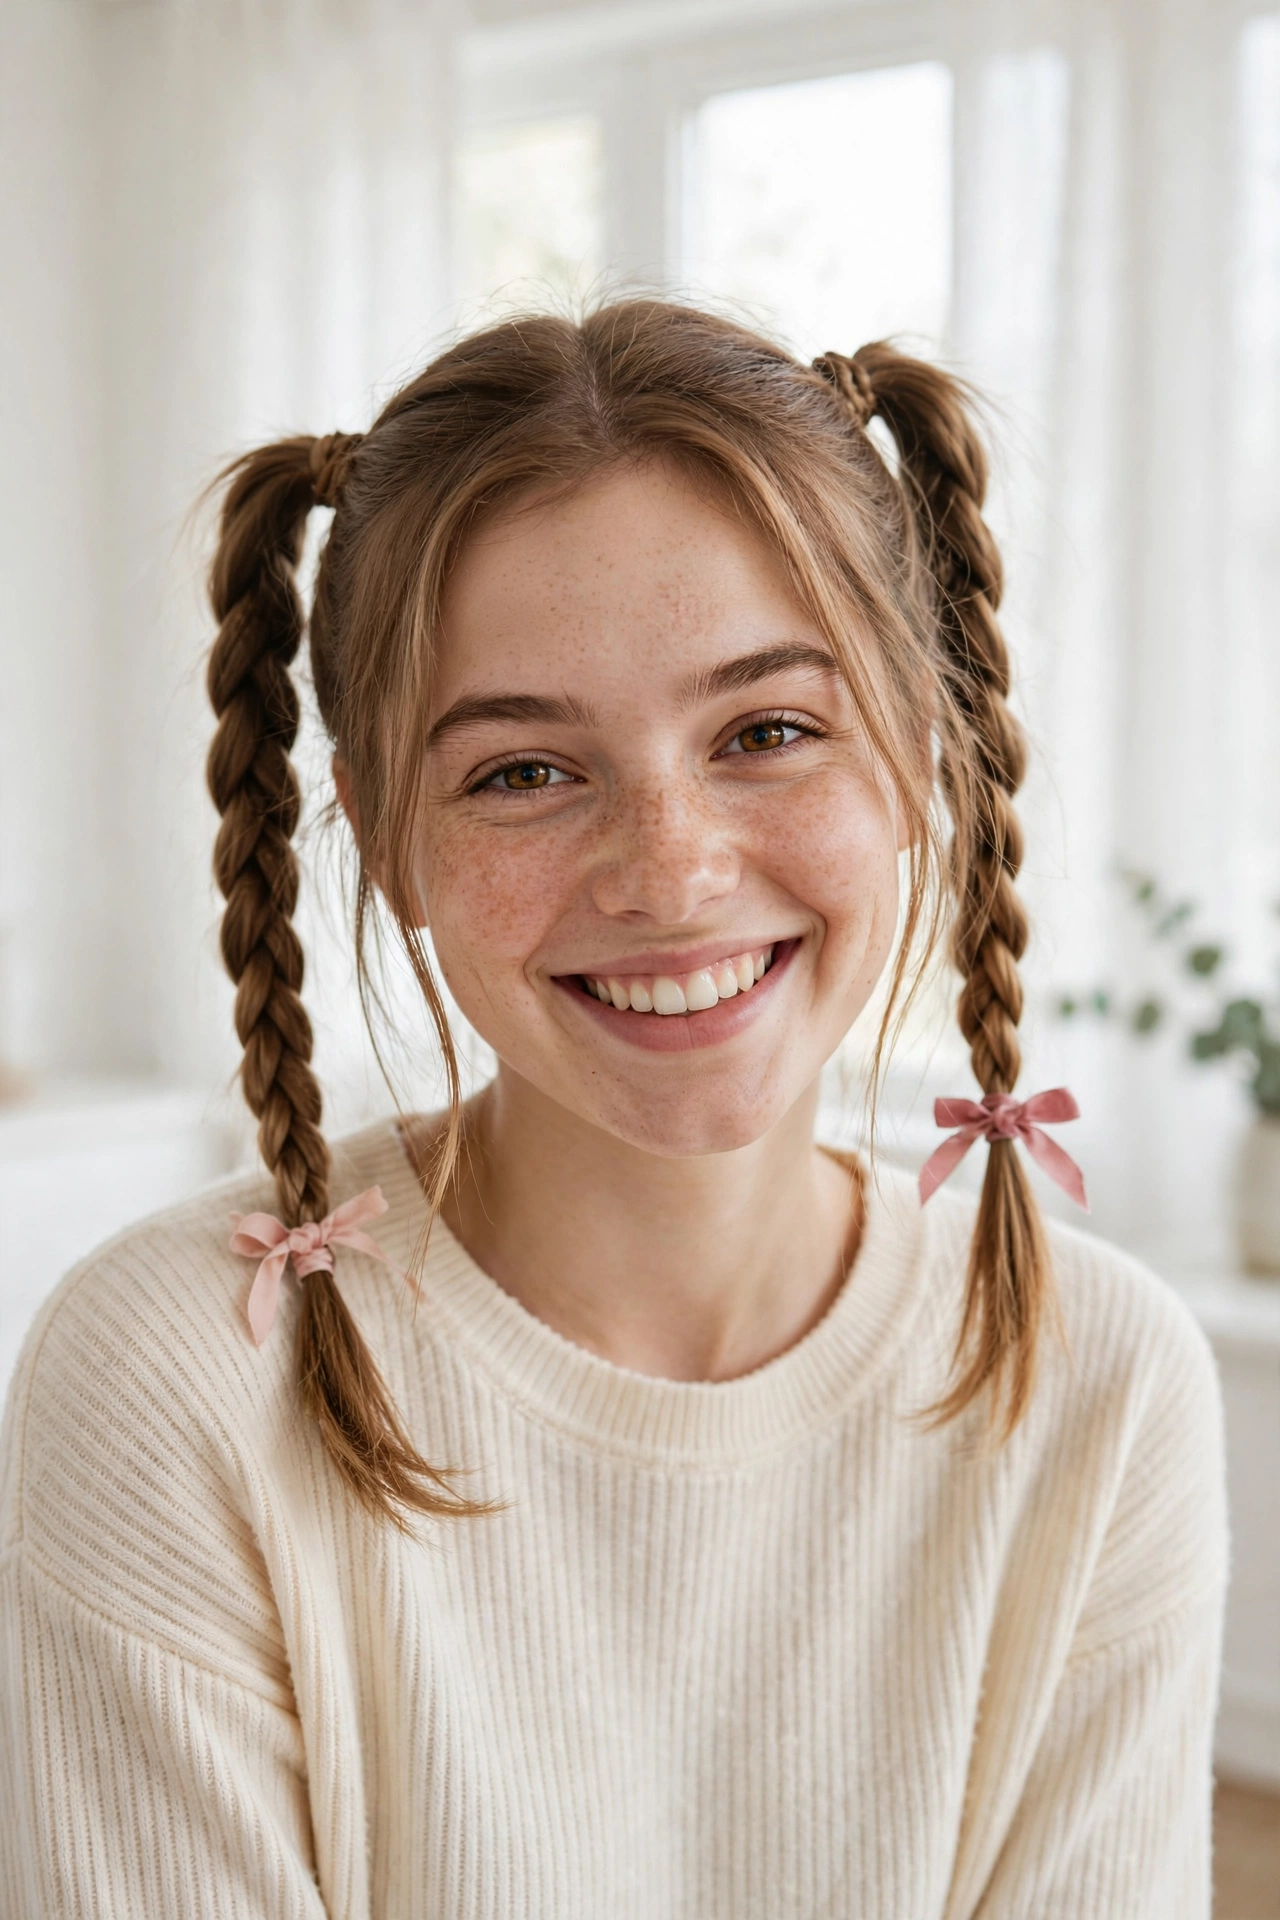
Part your hair down the middle into two equal sections and secure one side while you work. Dutch braid each side from the hairline to the nape, keeping the braids symmetrical by using the same section sizes on both sides. Tie each braid with a small elastic, then tie a silk ribbon into a bow over each elastic. For extra charm, curl the loose ends of each pigtail. The ribbons elevate the whole look from sporty to sweet in seconds.
Playful yet polished, this style is a favorite for school days, festivals, and casual weekends — and teen girls especially love how customizable it is; see our cute school hairstyles for teen girls for more morning-friendly ideas. Match your ribbon color to your outfit for a coordinated look, or choose classic black velvet for an edgier vibe. The double braids distribute tension evenly, so the style stays comfortable all day without giving you a headache by afternoon, even during long days out.
7. Dutch-to-Fishtail Hybrid Braid

Begin with a Dutch braid at the crown, crossing strands under and adding hair until you reach the nape. Instead of continuing the Dutch pattern, split the remaining hair into two sections and switch to a fishtail: take a thin piece from the outside of the left section and cross it over to the right, then repeat from right to left. Keep your fishtail sections small and even for that intricate, mermaid-like texture. Secure with an elastic and pancake the Dutch portion for contrast.
Among creative dutch braid hairstyles, this hybrid looks impressively complex but only requires two basic techniques you likely already know. The chunky Dutch top flows into the delicate fishtail tail for gorgeous textural contrast that stands out in photos. It is ideal for long hair — the longer the length, the more dramatic the fishtail section becomes. Wear it for weddings, proms, or any event where you want your hair to be the accessory. A light-hold hairspray keeps the fine fishtail pieces smooth without stiffness.
8. Dutch Braid Headband Updo

Part your hair where you want the headband braid to sit — a deep side part looks most elegant. Take a section from the heavier side near the temple and Dutch braid across the hairline toward the other ear, adding hair only from the front side to keep the braid hugging the head. Pin the end behind the opposite ear, then gather the remaining hair into a low chignon or twist. The braid acts as a built-in headband, framing your face beautifully.
Perfect for days when you want an updo without any accessories, this style keeps every strand controlled while looking effortlessly chic. It works on second or third-day hair and hides grown-out bangs brilliantly. For formal events, add small pearl pins along the braid; for everyday, leave it clean and simple. The headband effect draws attention to your eyes and cheekbones, making it a favorite for photos. Secure everything with strong-hold pins so the style lasts from morning to midnight without a single touch-up.
9. Bubble Dutch Braid

Dutch braid your hair from crown to ends in the classic underhand technique, then secure the end. Starting just below the crown, wrap small clear elastics every two inches down the entire braid. Gently tug each section outward between the elastics to create round, bubble-like puffs — the fuller you pull, the more dramatic the effect. This technique instantly makes fine hair look incredibly thick, and the whole style takes less than ten minutes once you get the rhythm down pat.
Playful and ultra-photogenic, this is one of those dutch braid hairstyles that looks far more complicated than it is — perfect for beginners who want maximum impact. It is a lifesaver for thin or fine hair because the bubbles create the illusion of serious volume. Dress it up with gold cuffs on a few bubbles for parties, or keep it casual for brunch. The elastics also make this one of the most secure braided styles, so it is ideal for dancing, travel days, and windy outdoor events.
10. Sleek Dutch Braid Low Bun for Work

Brush hair back smoothly and apply a pea-sized amount of smoothing cream to tame flyaways. Dutch braid tightly from the hairline straight back to the nape, keeping sections neat and tension firm for a sleek finish. Coil the remaining tail into a compact low bun and pin securely, then smooth the crown with a fine-tooth comb and a spritz of strong-hold hairspray. The result is boardroom-polished but took you under ten minutes on your busiest mornings. Tuck any stray ends with extra pins for a flawless finish.
Professional, neat, and endlessly versatile, this is the work hairstyle that never lets you down. The Dutch braid adds subtle visual interest to an otherwise classic bun, so you look put-together without trying too hard. It survives long commutes, back-to-back meetings, and even after-work plans without wilting. Pair it with a blazer and minimal jewelry for interviews, or soften it by pancaking the braid slightly for creative workplaces. Either way, you will look sharp all day, long after you leave the office.
11. Two-into-One Dutch Braid Combo
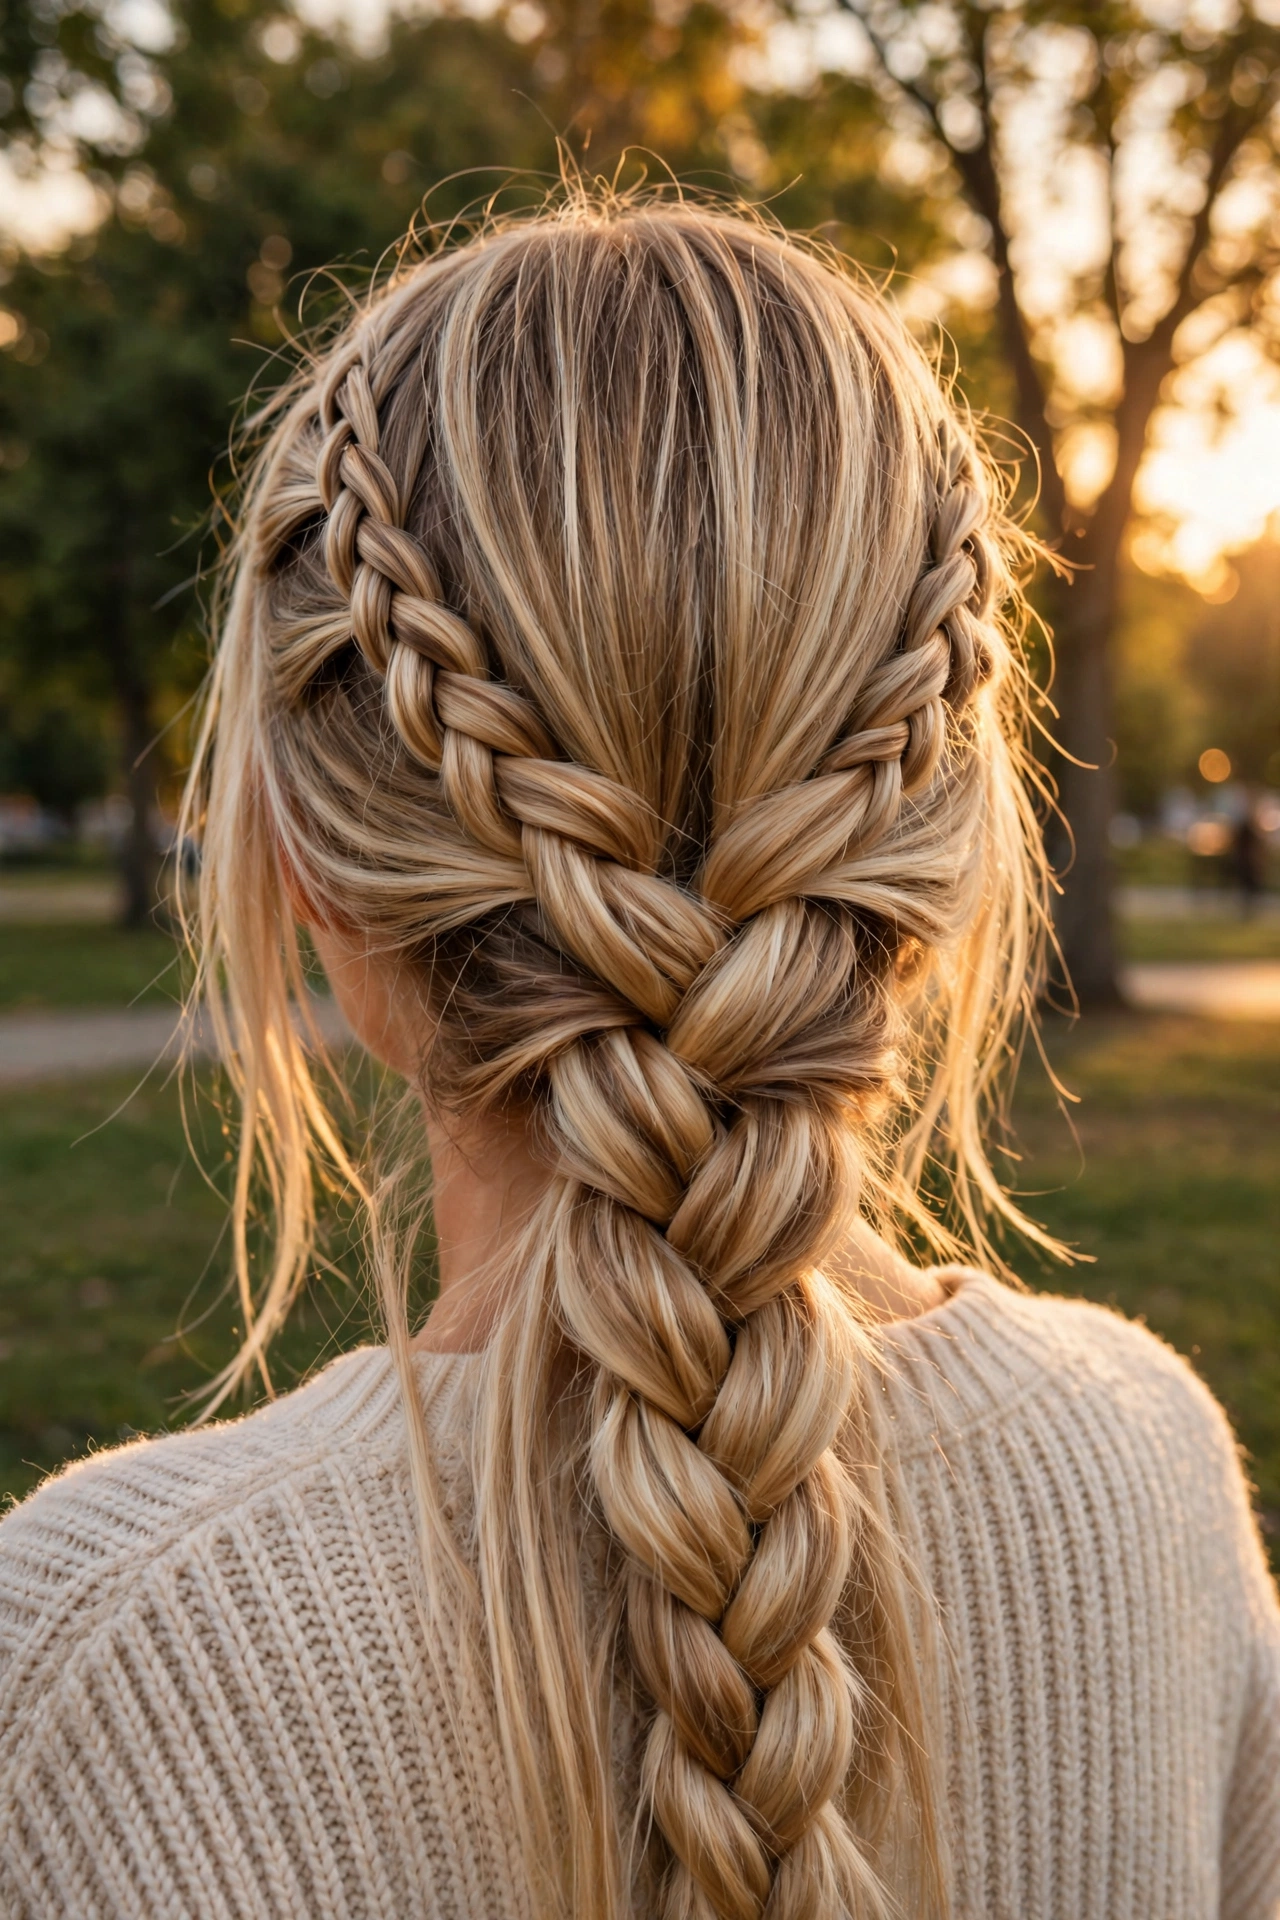
Part your hair down the center and Dutch braid each side separately from the temples toward the nape, just like classic double braids. At the nape, remove both elastics temporarily and combine all the hair into three sections, then continue with a single thick Dutch or regular braid down the back. Secure the end and pancake the lower braid generously. This combo gives you the intricate crown detail of double braids with the simplicity of one statement braid that always earns compliments.
This style is brilliant for thick hair because splitting the top into two braids makes the crown section far more manageable. The single thick braid down the back shows off the Dutch technique’s signature raised texture beautifully. It is a fantastic choice for graduations, concerts, and festivals where you want something eye-catching but secure. Add a few small gold rings to the lower braid for a trendy touch, or weave in a ribbon for special occasions that deserve extra flair.
12. Messy Boho Dutch Braid
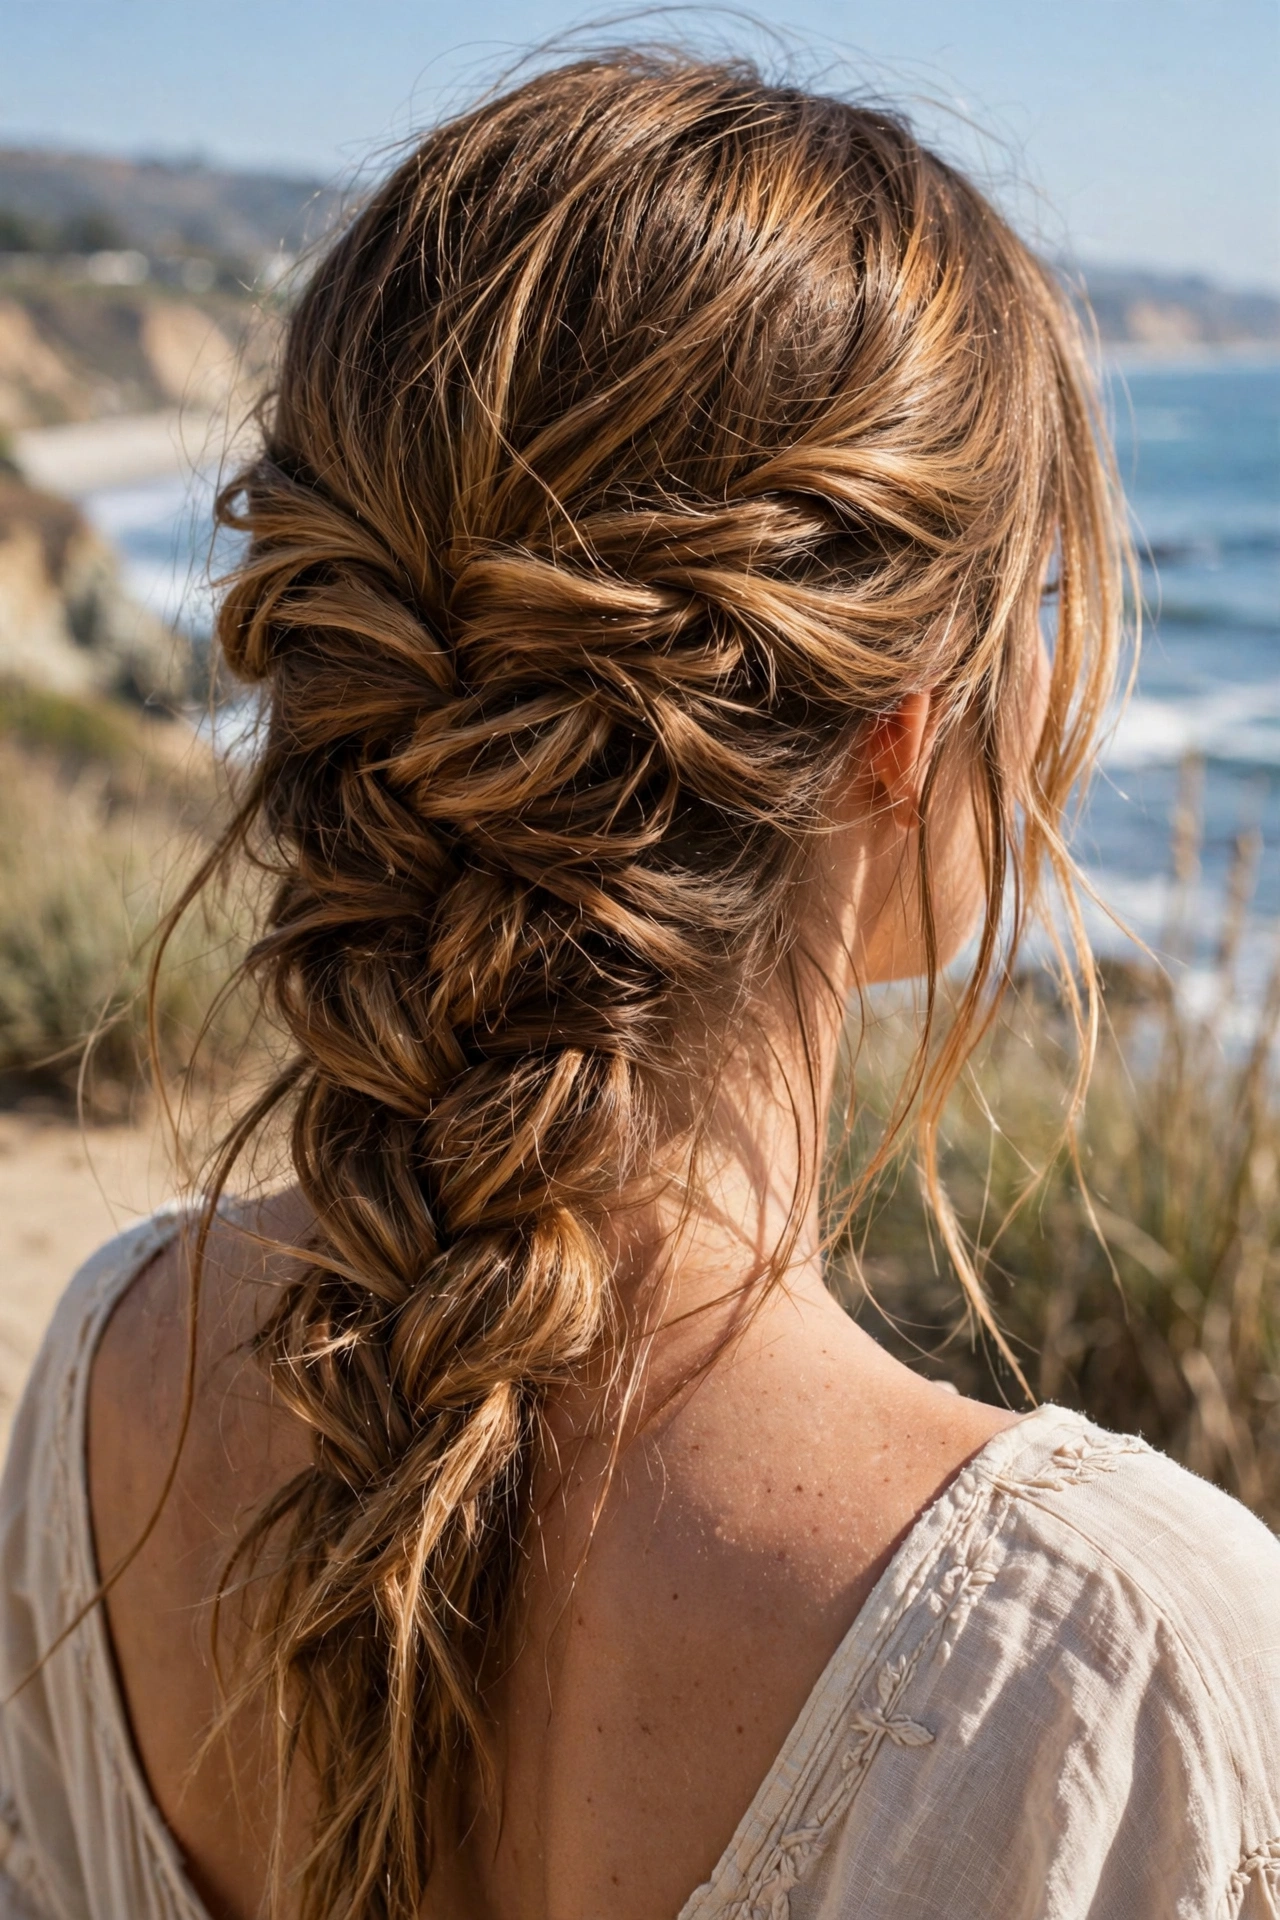
Prep with texturizing spray and rough-dry your hair for maximum grip and volume. Create a loose, imperfect Dutch braid starting at the crown — the key here is to not overthink it; slightly uneven sections are part of the charm. Once secured, aggressively pancake the entire braid, pulling edges wide for that undone boho fullness. Pull out face-framing pieces and a few wisps along the braid, then finish with flexible-hold spray so everything stays artfully messy through festivals, beach days, and golden-hour photos.
Effortlessly cool and endlessly wearable, this relaxed take on dutch braid hairstyles is made for free spirits. The deliberately undone texture means it actually looks better as the day goes on — no stress about perfection. It pairs beautifully with flowy dresses, denim cutoffs, and layered jewelry for that full bohemian aesthetic. This is also the most forgiving style for beginners, since mistakes simply blend into the messy finish. The messier, the better — embrace it and wear it with total confidence.
13. Dutch Braid with Curly Ends

Dutch braid from the crown to the nape using the underhand technique, keeping it neat and fairly tight. When you reach the point where you would normally finish the braid, stop and secure it with an elastic instead, leaving the bottom third of your hair completely loose. Curl the loose ends with a one-inch wand, alternating directions for natural-looking bounce. Gently separate the curls with your fingers and finish with shine spray for glossy, defined ends that catch the light beautifully.
Among glamorous dutch braid hairstyles, the contrast between the sleek braided crown and bouncy curled ends makes this style feel glamorous without much effort. It is a wonderful choice for date nights and parties when you want volume and movement. The curls also help the style last longer, since they disguise any loosening at the braid’s tail. For extra romance, curl a few face-framing pieces too. This hybrid gives you the polish of a braid and the softness of curls in one gorgeous, photo-ready package.
14. Double Dutch Braids into a Low Ponytail
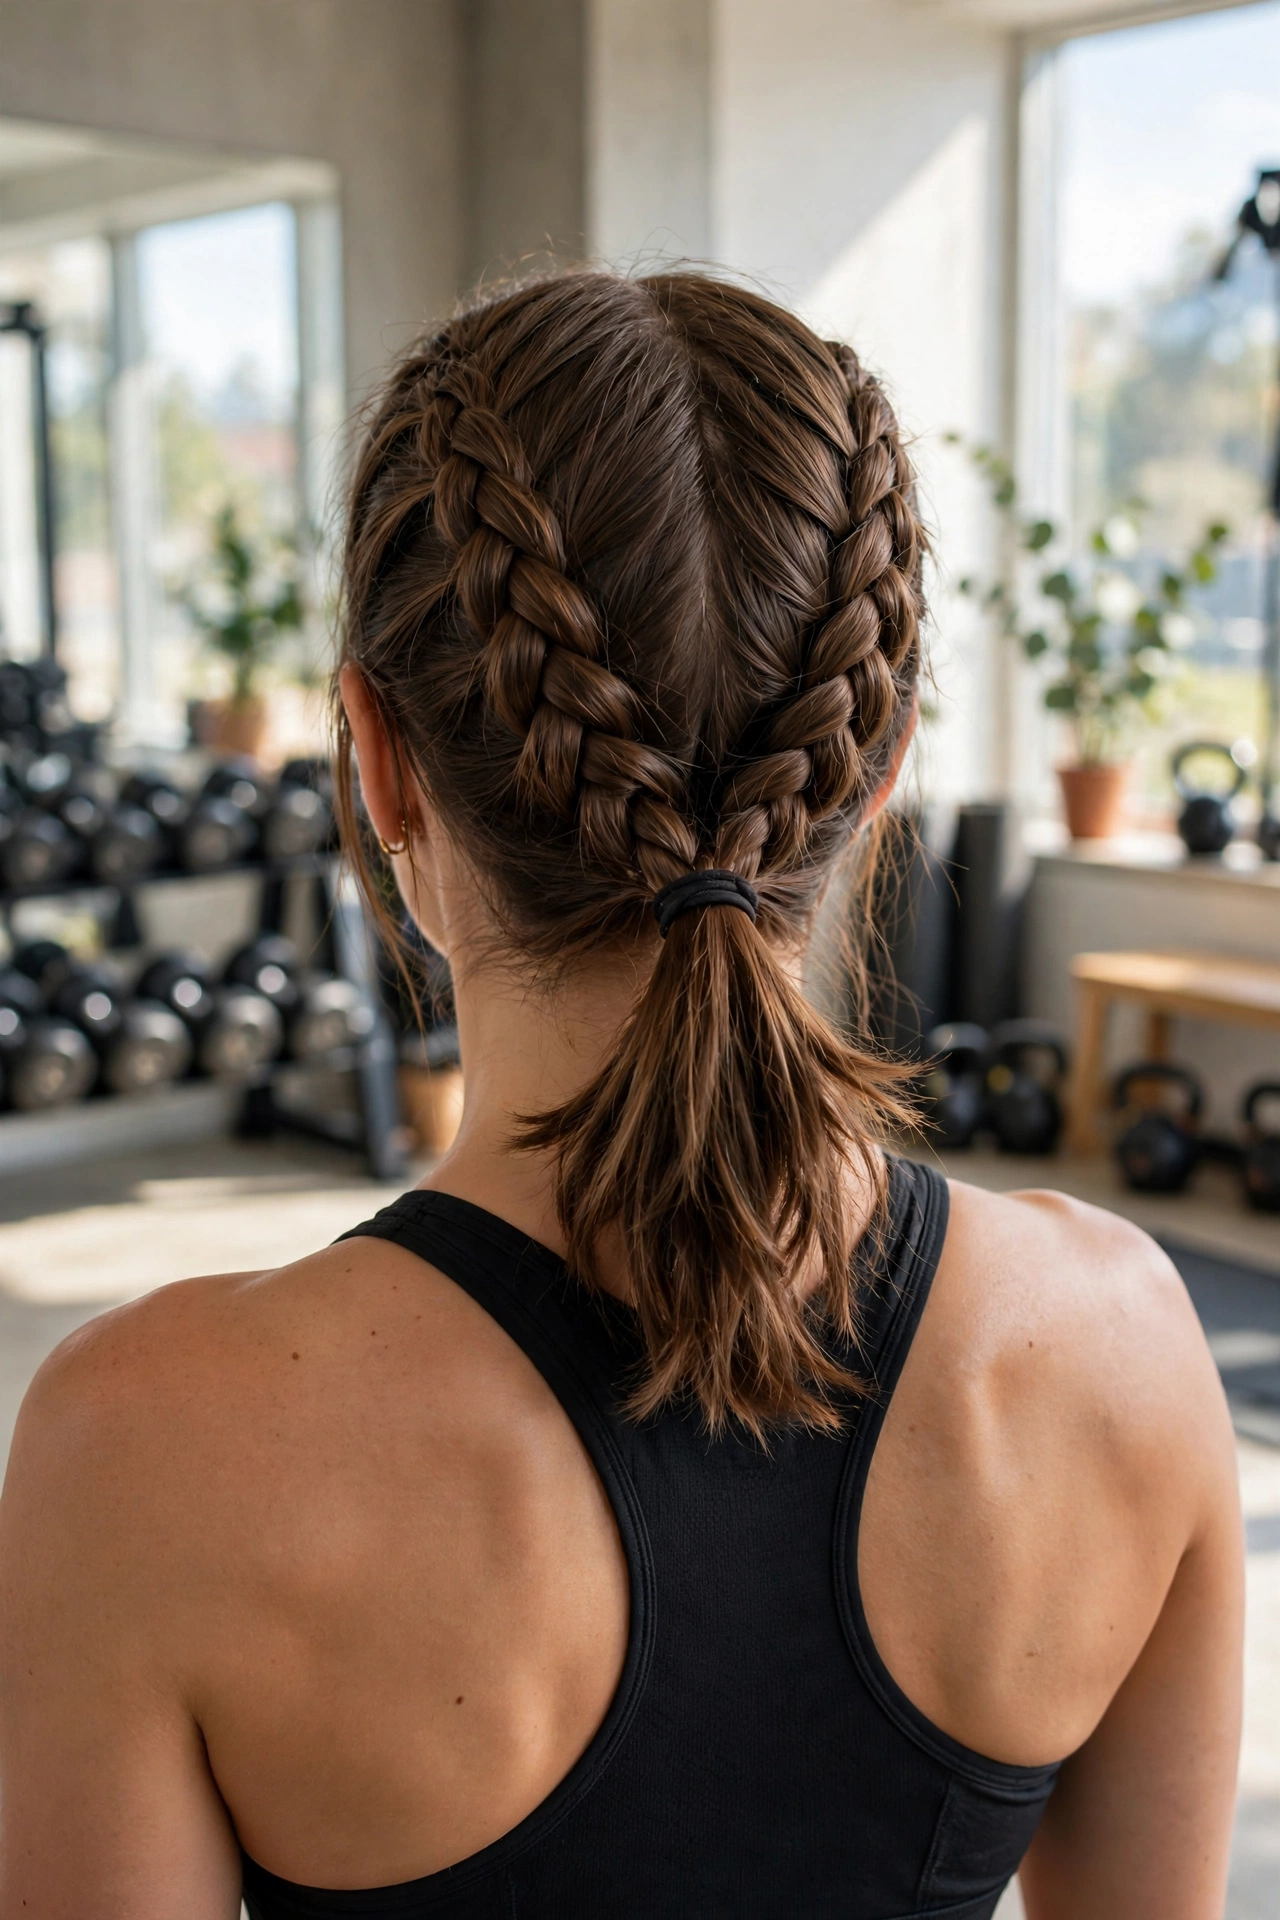
Dutch braid both sides of your hair from the hairline to the nape, just as you would for classic double braids. Instead of continuing down, gather both braid tails plus any remaining hair into one low ponytail at the nape and secure firmly. Wrap a small section of hair around the elastic and pin it underneath for a seamless finish. Smooth any bumps at the crown with a brush and a little gel — the whole style takes about five minutes.
Sporty, secure, and seriously quick, this is the ultimate active-day hairstyle — and if you love fast styles, our easy 5-minute hairstyles for busy mornings has plenty more. The double braids keep everything locked in place through workouts, while the low ponytail keeps the look soft and feminine rather than severe. It is also a great protective style that minimizes tangling on windy days. Refresh the ponytail with a quick brush-through and you are ready for round two.
15. Dutch Braid Top Knot
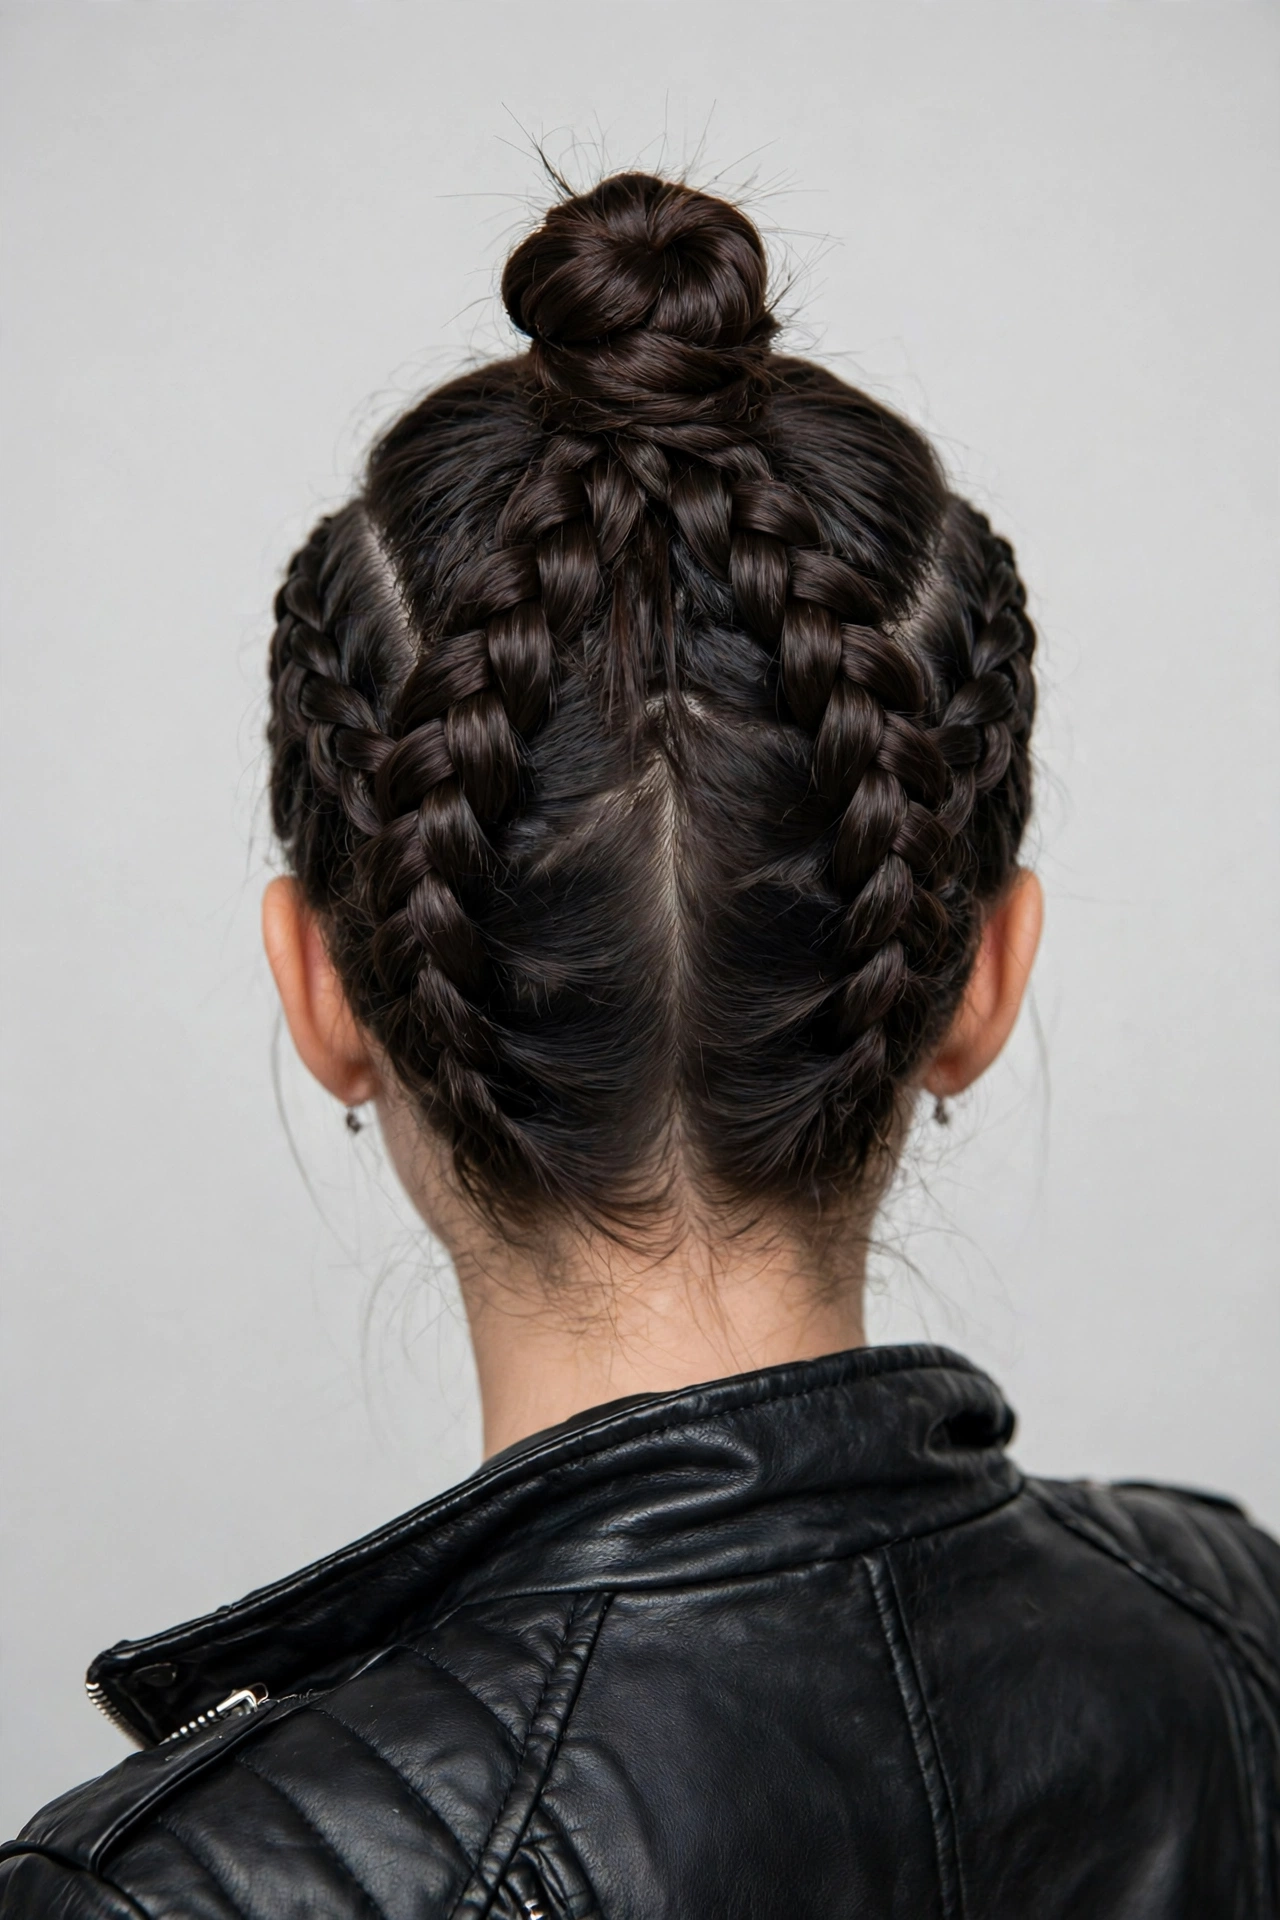
Dutch braid upward from the nape toward the crown — flipping your head upside down makes this much easier. You can do one center braid or two side braids for extra edge. When you reach the crown, gather all the hair into a high ponytail and twist it into a top knot, pinning securely. Fan out the knot slightly for fullness and smooth the braided sections with gel. The result is equal parts edgy and elegant with serious staying power.
Bold and fashion-forward, this is one of the most striking dutch braid hairstyles for nights out and festivals. The braided undercut effect looks intricate but the technique is straightforward once you practice the upside-down braid. It keeps hair completely off your neck, making it perfect for hot weather and dancing. Add edge by keeping the braids tight and sleek, or soften the look by pancaking them. Either way, this style guarantees compliments thanks to its dramatic silhouette at every event you attend.
16. Waterfall Dutch Braid

Begin a Dutch braid at one temple, but with a twist: each time you would add hair from the bottom strand, drop that strand entirely and pick up a new section of hair just behind it. This creates the signature waterfall effect, with strands cascading through the braid. Work across the back of your head to the other side and pin the end discreetly. The dropped strands should fall naturally through your loose waves below for maximum romance. Keep the braid fairly loose for softness.
Dreamy and romantic, the waterfall braid is pure fairytale hair — ideal for weddings, proms, and garden parties. The cascading strands catch the light beautifully, especially on highlighted or balayage hair where the color dimension shines through. It looks most magical paired with soft curls, so wand your ends before you start. While it takes a little practice to master the drop-and-replace rhythm, the breathtaking result is absolutely worth the learning curve and earns endless compliments from everyone who sees it.
17. Scarf-Woven Dutch Braid
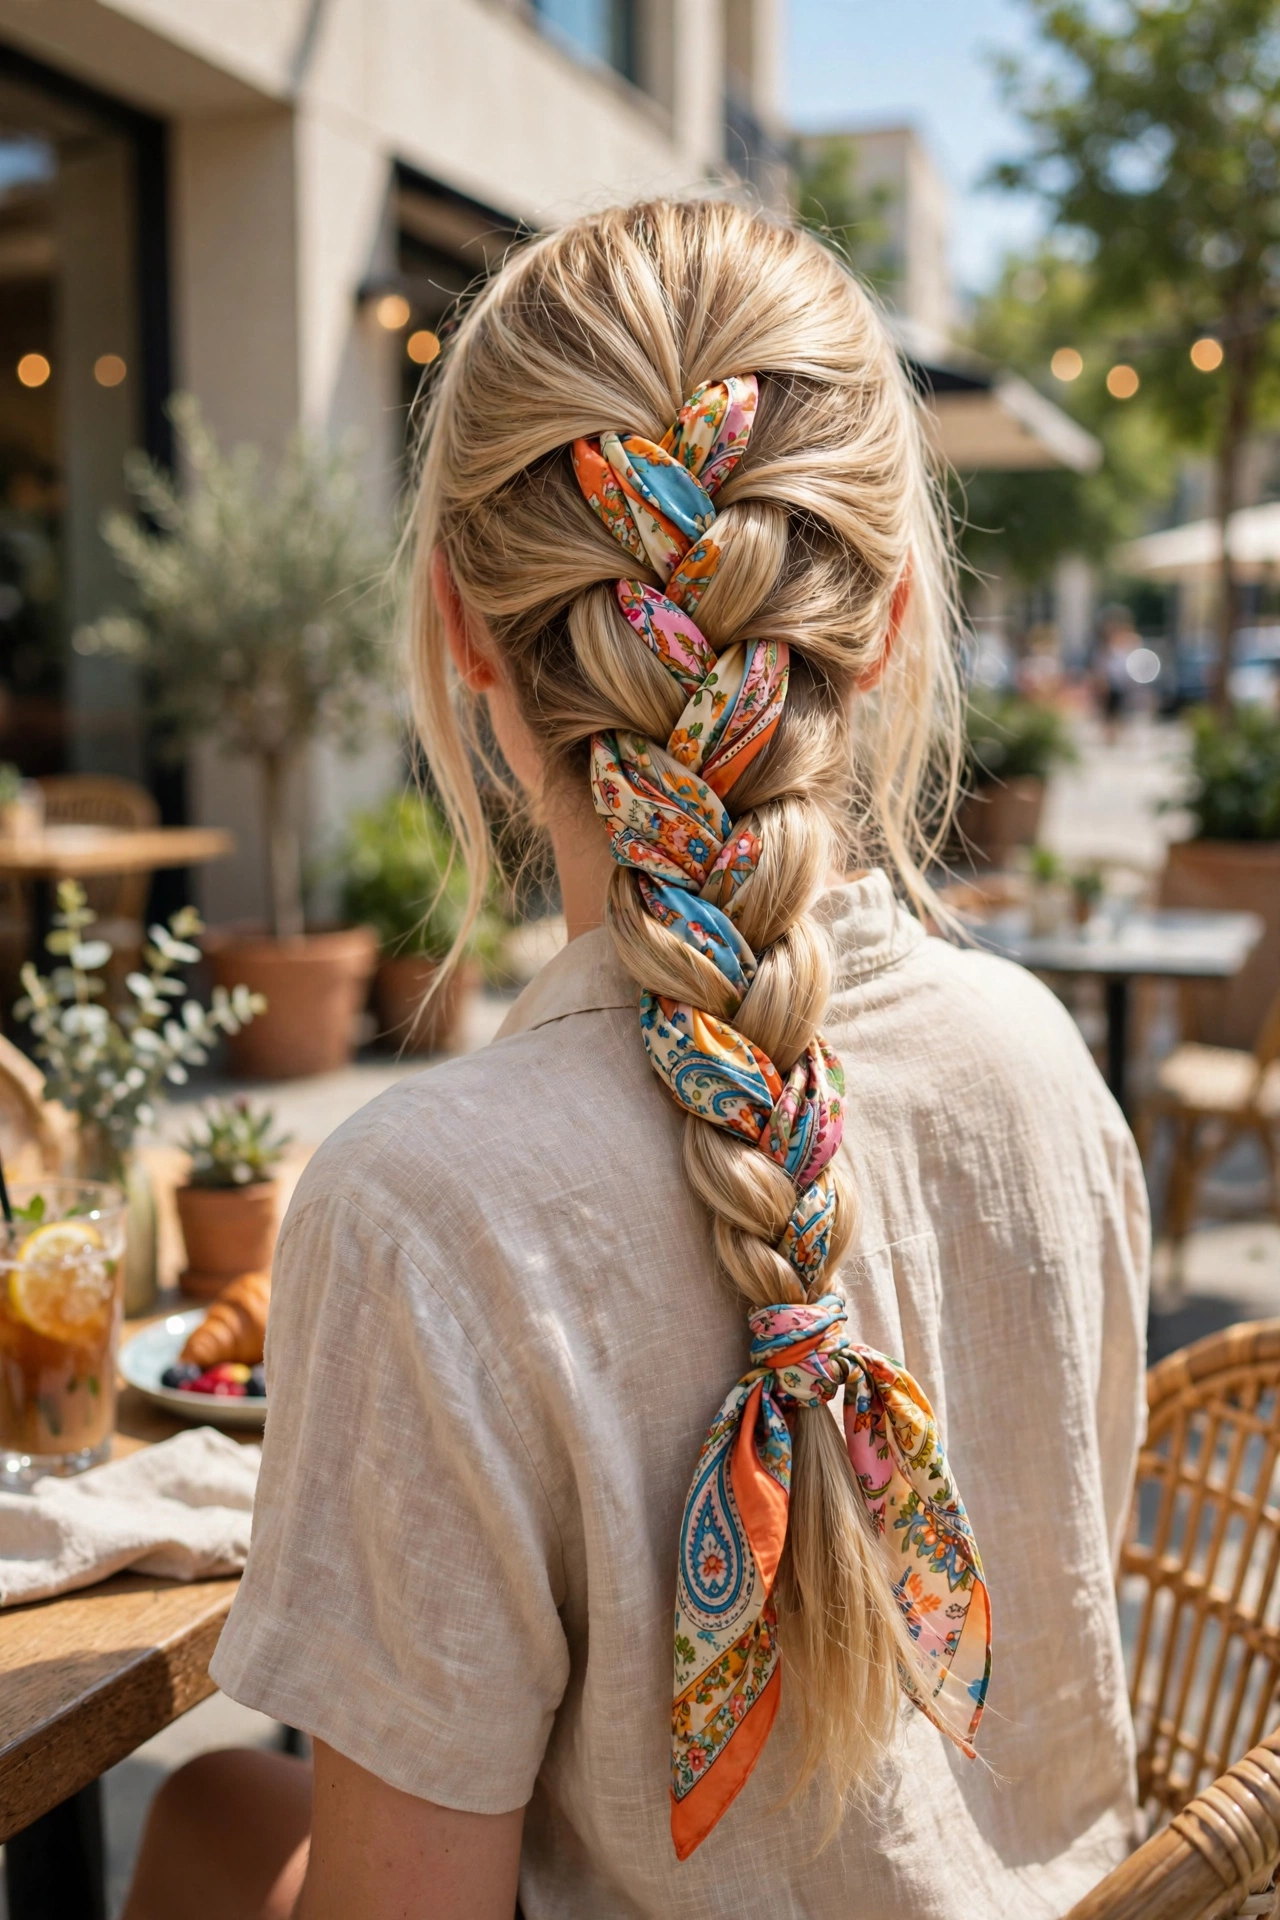
Fold a long silk scarf into a narrow band and tie it around your head like a headband, knotting it at the nape with the ends hanging down your back. Incorporate the two scarf ends as extra strands as you Dutch braid — simply treat the scarf like part of your hair sections. Braid all the way down, letting the scarf weave through the braid for pops of color. Tie the braid end with the scarf itself for a polished finish.
Chic, colorful, and endlessly customizable, this is the dutch braid hairstyle that turns heads on vacation and at summer festivals. Swap scarves to match any outfit — florals for brunch, bold prints for concerts, silk solids for dinner dates. The scarf also adds grip, making the braid easier and more secure, plus it protects the style from humidity frizz. It is proof that one simple accessory can completely transform a classic braid into something truly unforgettable. You will love the compliments.


You May Also Like

15 Half Up Claw Clip Hairstyles for Easy Everyday Elegance in 2026
18 Rich Burgundy Hair Color Ideas for a Deep, Glamorous Look
